Installation of Stainless Steel Cable Mesh


The installation of stainless steel wire cable mesh is much easier than you might expect and requires only a minimum of tools.
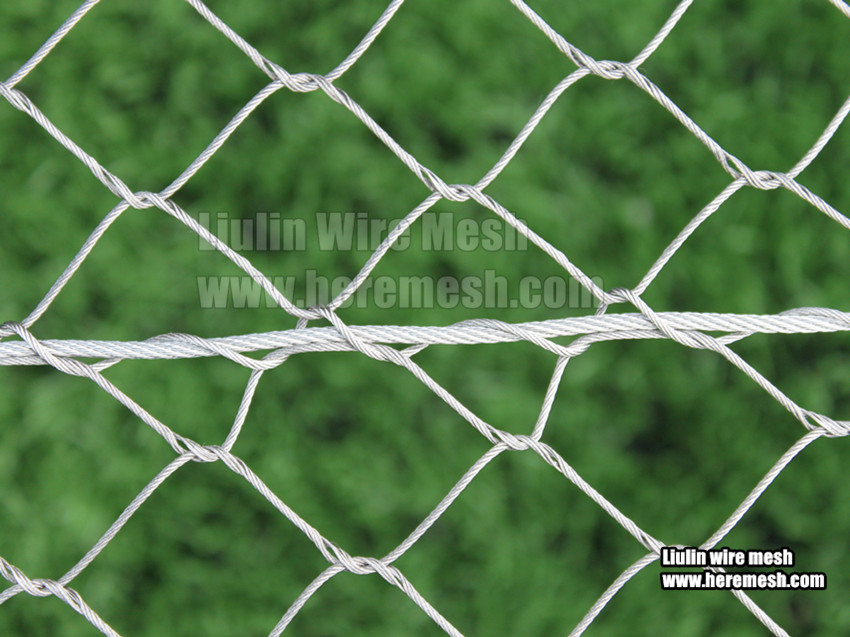
In the case of large structures (such as zoo enclosures), matching frames and meshes in order and according to actual conditions is the key to success.
Ensure that the mesh has a uniform focus so that the correct tension to maintain the overall structure is safe, beautiful, and durable.
All in all, the precise custom mesh size makes the installation work simple and effective, avoiding the problems that need to be cropped. The bigger the project, the more you can save on your expenses.
Installation steps
The mesh panel arrives in front of you in precise dimensions.
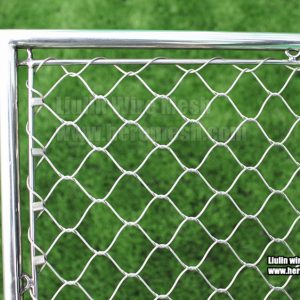
You only need to follow the installation instructions and use a wire rope to firmly wrap the edge of the mesh onto the frame or support structure to tighten the mesh.
Customized sizes and matching frames are very easy to assemble. Of course, due to the elasticity, the width and height of these meshes in the contraction state need to be carefully identified by you.
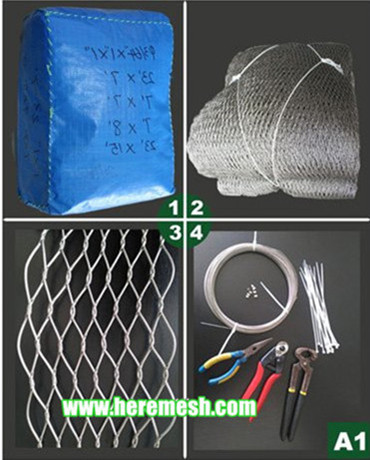
→ PIC A1: Preparation work
☑ 1. the bags of wire rope woven mesh you received
☑ 2. open the bags you will see the mesh rolled
☑ 3. expand the zoo mesh, the natural mesh each angles are not 90°
☑ 4. some of these fittings: wire ropes, ferrules, tongs, etc
Then, install according to the following methods.
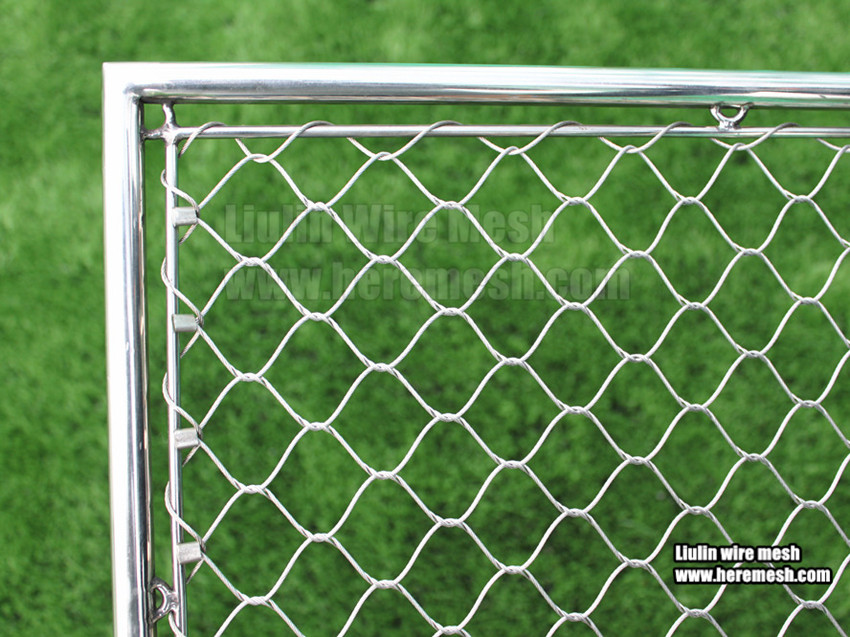
The diagram of standard installing method of stainless steel rope woven mesh.
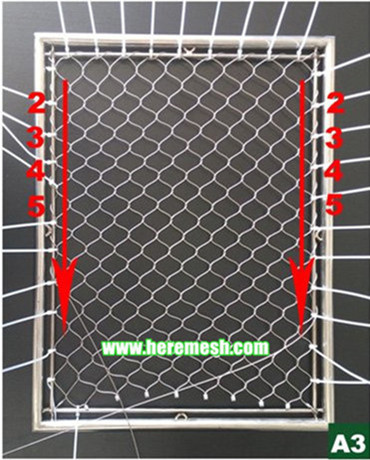
→ PIC A2, A3, A4 : Install steps
>Step 1.Determine the width and height of mesh direction according the pic A2;
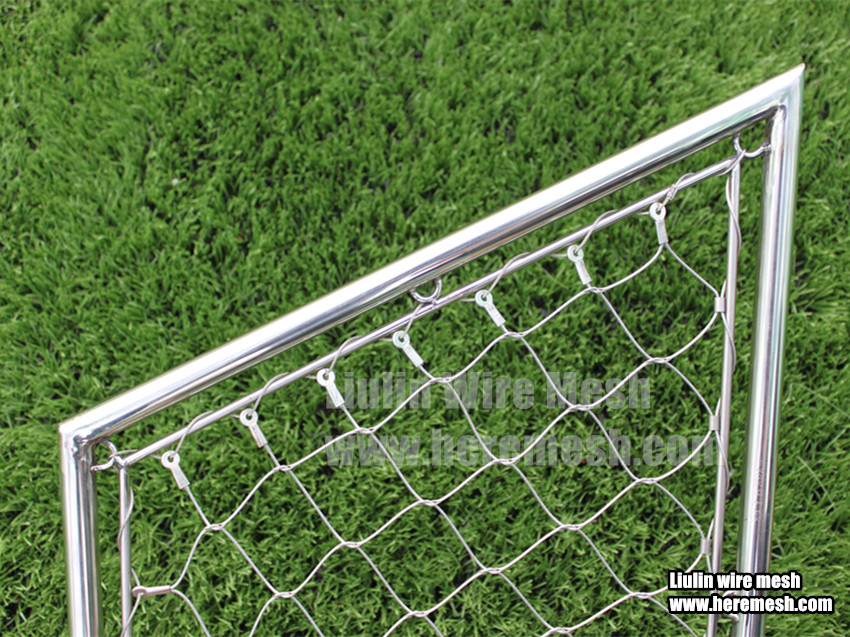
>Step 2. First fix the two corners with cable ties, said, first fix 1 and 1 mark at;
>Step 3.Fix TOP line A;
>Step 4. Fix height direction's 2 and 2, 3 and 3, 4 and 4,5 and 5... codes at the left and right followed by uniform in pic A3
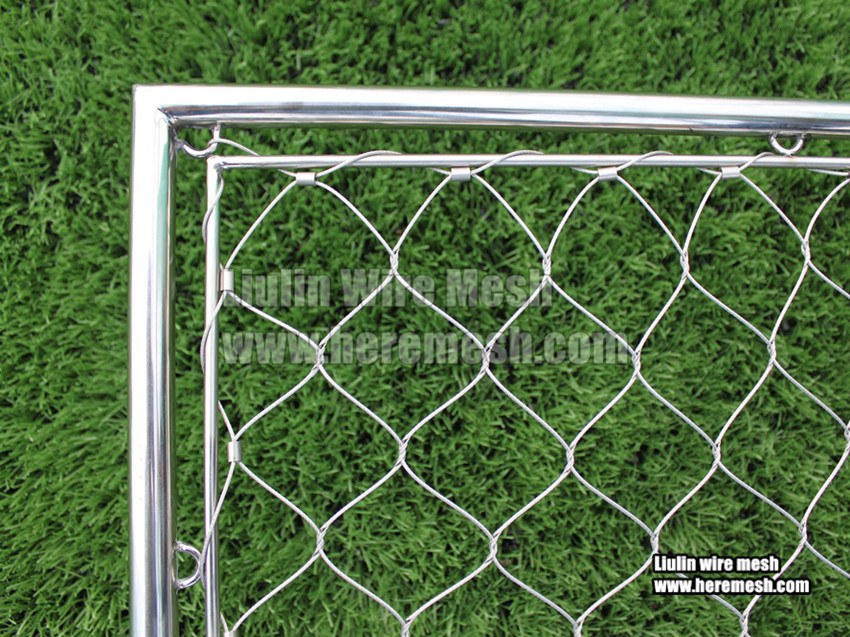
>Step 5.Fix the mesh to the bottom;
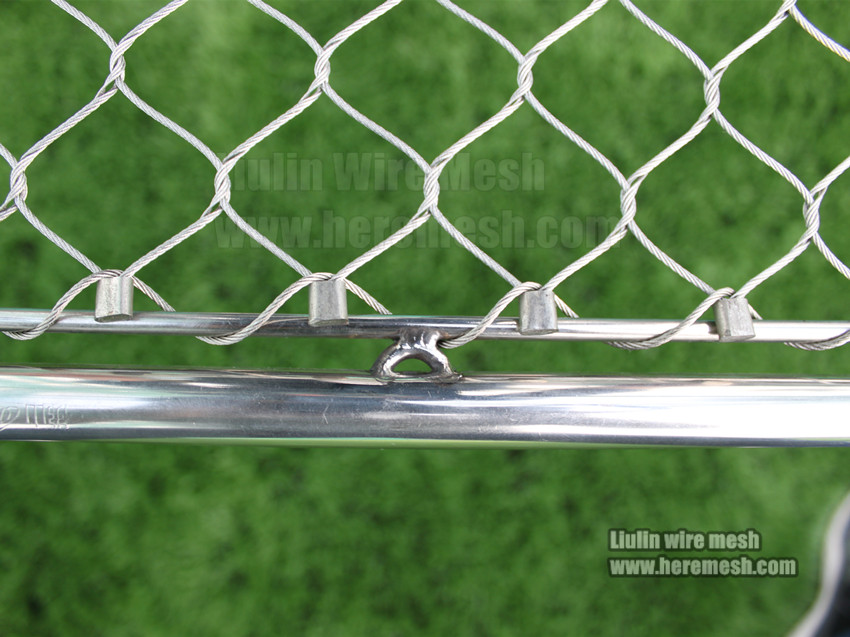
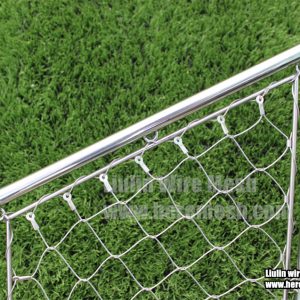
>Step 6. Using the wire ropes back and forth between the mesh and frame, this method is the most common way, fast and strong.
>Step 7.The ends of both perimeter ropes must be threaded through a ferrule and then pulled taught. Now, all the cable ties can be remove.
>Step 8.Swage the ferrule with the swaging tool, and cut off lose ends of the perimeter rope. Now, each of the mesh angle is 90 °.
☑ 1. the bags of wire rope woven mesh you received
☑ 2. open the bags you will see the mesh rolled
☑ 3. expand the zoo mesh, the natural mesh each angles are not 90°
☑ 4. some of these fittings: wire ropes, ferrules, tongs, etc
Then, install according to the following methods.
The diagram of standard installing method of stainless steel rope woven mesh.
→ PIC A2, A3, A4 : Install steps
>Step 1.Determine the width and height of mesh direction according the pic A2;
>Step 2. First fix the two corners with cable ties, said, first fix 1 and 1 mark at;
>Step 3.Fix TOP line A;
>Step 4. Fix height direction's 2 and 2, 3 and 3, 4 and 4,5 and 5... codes at the left and right followed by uniform in pic A3
>Step 5.Fix the mesh to the bottom;
>Step 6. Using the wire ropes back and forth between the mesh and frame, this method is the most common way, fast and strong.
>Step 7.The ends of both perimeter ropes must be threaded through a ferrule and then pulled taught. Now, all the cable ties can be remove.
>Step 8.Swage the ferrule with the swaging tool, and cut off lose ends of the perimeter rope. Now, each of the mesh angle is 90 °.

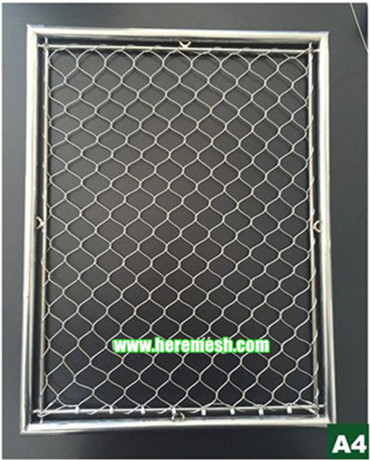
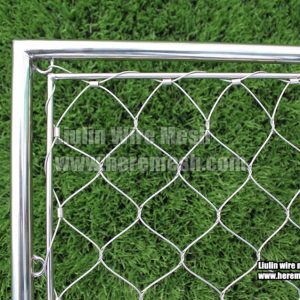
Case reference
The following is the finished product after installation for your reference.
The steel wire rope will link and expand the frame with the mesh or between the mesh and the mesh.
This method is the most flexible and practical.
Note that use a slightly larger wire cable diameter as the connecting cable.
The steel wire rope will link and expand the frame with the mesh or between the mesh and the mesh.
This method is the most flexible and practical.
Note that use a slightly larger wire cable diameter as the connecting cable.